Tuesday, December 31, 2013

Resin Safety Precautions

This is not meant to scare you away from working with resin! Resin is a fun, versatile, and pretty much safe medium to work with when worked with right. 
When mixing/pouring resin
  • Wear disposable gloves. Some people are highly allergic to resin and you probably don’t want to find out the hard way. If you get resin on your hands it is also hard to clean off and it just isn’t good for your skin.
  • Work in a well ventilated/open room. If your room is small try opening a window, use a fan, ect ect Some brands of resin have stronger fumes than others. If possible try using a low fume brands (I have found EasyCast still has very strong fumes even though they advertise otherwise.) If you are not able to work in a well ventilated area or your resin has very strong fumes invest in a respirator. 
  • Cover your work surface. Anything resin touches will be ruined. I don’t recommend newspaper because resin can leak through it and destroy the table underneath. Wax paper usually works pretty well. 
  • Tie up long hair, don’t wear loose/baggy sleeves. Again, anything resin touches will be ruined. I recommend wearing clothes you don’t mind getting ruined when wearing resin. Wearing old aprons is also a good idea, especially when working with large amounts. 
  • When you are done with pouring your resin put it up somewhere safe to dry, especially if you have kids/pets in the house. 
When sanding resin
  • Wear a mask. Wear a mask. Wear a mask. Resin dust will ruin your sinuses and is just awful to have in your airways. 
  • Wear safety goggles. It will keep resin dust out of your eyes and keep you safe if a piece slips out of your hands and comes flying towards you.
  • Tie up loose hair, don’t wear loose jewelry, no loose sleeves ect. Basically you don’t want anything getting caught in those fast spinning sanders/buffers. 
  • If possible work outside. If you cannot work outside please remember to go outside immediately afterwards and brush off all the dust on your clothes.
When glazing resin 
  • Basically follow all the safety precautions for pouring resin. 
  • Read the safety precautions for your glaze before use
Also anything used for resin is no longer safe to use with foods, don’t do that. Don’t reuse any molds with chocolate or any other foods. Buy a new mold. Any other tools you use with your resin, do not re-use with food. I don’t care if you cleaned it, it isn’t worth risking, the resin may have seeped into the mold/item. Just buy a new one. 

Saturday, December 14, 2013

New Drippy Heart Bat Necklace


So I have always done my dripping heart bat necklaces with a colorful heart and a black bat in the center. Yesterday morning I woke up with a different suggestion from an anon. 


And here is the end result!


I really love how it turned out! I currently have a pink version setting right now. I think this version has more of a pastel goth feel to it. Thank you anon for the lovely sugestion!


Personal Website: http://rarasjewels.weebly.com/


Wednesday, December 11, 2013

Hot Pink!


I have been working with mint for a little while now, so I decided it is time to start working with another color. A while back I had someone order a custom pair of wing clips in hot pink to match their outfit, but after that custom order I put the hot pink color aside and completely forgot about it. While cleaning I found it again and decided to experiment with using it. I used it to make some cabs for a phone case, but it wasn't until now that I decided to make regular jewelry with it too!


This is how the first batch turned out! I really like the color and I plan on making more items with the color during winter break. I don't know what color I will try out next, but I want to make sure I have a lot of hot pink items made before I try another color. Maybe neon purple would be fun!


Tuesday, October 29, 2013

Resin Care Tips

This applies to all resin jewelry, not just pieces I have made! If you own resin pieces from other shops these care tips should still apply.
  1. Avoid submerging resin pieces in water. Your pieces will look newer longer if you take them off before swimming, showers, ect. Resin is water resistant, but not water proof. Water can damage resin over time, and it can also damage the jewelry findings. 
  2. Avoid storing your jewelry pieces in direct sunshine. Repeated sun exposure can cause some resin pieces to yellow over time. This especially applies to pieces that are clear. Heat from direct sun exposure can also make larger/thinner pieces ‘loose’ and almost gummy like. This is not permanent and the piece will regain its normal hardness when cooled, but it is still not recommended.
  3. Jewelry chain fall off? Ring base has become loose? No issues! Jewelry chain can easily be fixed up with some pliers. Almost every household has a pair, and if you don’t you can probably find them at the dollar store. For glued on pieces you probably won’t want to use super glue. While cheap, it is super messy. Instead opt to use E6000. E6000 can be found at most craft stores, but I have found that it is much cheaper at Walmart.. if your Walmart has a craft aisle. 
  4. If you get a little something on your resin pieces no worry!  It can easily be cleaned off. NEVER. EVER. Use something abrasive to clean your pieces. Use a soft washcloth with somewhat warm soapy water to clean it off and then dry once it is clean. Try not to be forceful. It can leave scratched in your piece. Resin is strong and durable, but it isn’t worth risking! After the quick cleaning dry your piece off right away.
  5. I have never tried this myself, but I hear that jewelry cleaning solutions can damage resin. If your chain needs some shining try using a metal cleaning cloth.

Sunday, October 20, 2013

★~★Decoden!!★~★

New to Rara's Jewels; decoden items! 
Each piece is unique because the cabochons are handmade by me out of resin! You won't get decoden items quite like these anywhere else~

First up are some decoden compacts! These compacts are pretty big~ They are perfect to carry in your purse for "touch ups" during the day. Each compact is $10 and custom compacts are available upon request.


Next up are cases for the 3DS. Right now I only have cases for the standard 3DS, but cases made to fit the 3DS XL are available upon request. 3DS cases are $25 each.

Case has been sold - similar one can be made upon request


And finally I have phone cases! I offer cases for all phone types. As long as there is a clear case available for your phone type I can make it a decoden case. Price varies and depends on the size of your phone. 


If you have any questions or are looking for a custom decoden item please contact me via Etsy! Thank you for stopping by and have a great day~


Thursday, August 22, 2013

Baby Axolotl Journey

Today I want to talk about my Axolotl, Dr. Shrunk. He is named after Shrunk from Animal Crossing~

I actually didn't know what animal Shrunk from Animal Crossing was for a very long time. I always thought his character was funny, but I didn't ever think to look up what animal he was. One day when browsing tumblr I was introduced to Axolotls (also known as water dragons) and I was instantly amazed. I read up on them. Learned how to care for them and everything. I was instantly disappointed because I found out that most pet stores don't sell them, but I continued to read on anyways. Thankfully after close to a month of research and searching I found a store that sold them. I saved up the money as soon as I could and got him. Because Dr. Shrunk is one of my favorite AC characters I thought it would be fitting that my axolotl was named after him.

Very image heavy after the cut.


Thursday, July 25, 2013

Betta Care: What you need to start keeping bettas

When I first started out with my first betta, Tank, I was pretty clueless. I did some research, but not enough. Workers at the pet store weren't much help. (A general tip I can give is don't rely on your pet store for information, especially at a chain store. Although some of the workers are knowledgeable, many more are not given the proper training to teach others on betta care.) Thankfully I was able to learn lots of information through the #betta tag on tumblr. There are several people in the tag who have owned bettas for a long time who are willing to give out helpful info. I am thankful for them, because they have all taught me so much.

Today I am going to go over a brief list of what you need to set up your betta's aquarium. Please make sure to do lots of research before buying any pet; read more than just this blog post. Be sure that you have enough money and that you can make a commitment to taking care of these fish. Bettas live on the average of 2-4 years when properly taken care of. Will you still be able to take care of your bettas in a year or two down the road? Who will feed your fish if you go on an extended vacation? Do you have the time to do water changes weekly? Think about questions like these.
When first setting up for your betta I suggest you have around $150-$200 set aside. You may not need to use all of this money, but it is better to have more vs less. If you feel like you cannot spend that much money bettas may not be for you. Once you have everything for your tank set up you won't be spending nearly as much. After initial set up main expenses would be food (which will last you a while), replacement cartridges for your filter about once a month, buying water dechlorinator, replacing something if it breaks (such as the heater not working anymore), ect. Check under the read more for my suggested list of items you need, plus some pictures of my two boys.

Wednesday, June 26, 2013

CoffinCreeps Review


I have yet another review for everyone! (and I will have another one coming soon too!)
Today I will be reviewing CoffinCreaps on Storenvy. I contacted her about doing a trade and review. She has bought from my Etsy shop a few times, and when I saw she was opening her own store I got super excited. She custom designs sweaters, tanks, crop tops, and more. They are awesome and have a creepy cute theme. 


The spider is painted on using fabric paints. She included a paper with care instructions on how to wash it and best preserve the image. Paints like these stay on for a very long time!


Here is a close up shot of the little spider guy. Spiders are usually super scary to me, but not this guy. He is adorable!

I also want to mention that this sweater is super thick and soft on the inside. It is a quality sweater. It will be great for the freezing cold Michigan winters. Brrr. 

If you like what you see you can get similar items and way more from LavenderBeauty's shop on Storenvy!


Tuesday, June 25, 2013

Lutrasaura Review

Hello! Today I will be doing another review~ Today I am reviewing Lutrasaura Resin Dreams~ I have been talking back and forth with the owner for a little while now. She is super sweet and the idea of a trade was brought up. I was super excited because trades are always fun!
We did this trade a little differently then how I have done other trades in the past. All the items I received were a surprise! It was super exciting to open the package to find all the surprise items!


Here are  all the items! So cute and such a variety~ She also drew an adorable picture on the back. It is so perfect~

Here is a close up view of all the items!


I am wearing the kitty one right now! It is my favorite. 


Communication was great. She was always really friendly when we talked. I looked forward to getting messages from her. She kept me up to date with what was going on with the trade. 


She includes a handwritten note, a business card, some kawaii sticker flakes (which I love to collect), and some pastel ball chain necklaces. 


And for anyone who is interested you can use the coupon code "SKITTYMILK" for 15% off of your purchase. 


My personal favorite item is the bone charm. I used it on my 3DS~ 

Overall I am super happy. The items are great quality, super cute, fast shipping, and great communication! All the things you want in a seller. I would highly recommend.


Saturday, June 22, 2013

MochiMir Review!

Hello everyone! Today I am going to be doing a review for MochiMir's shop on storenvy~ I was contacted by them and we talked about doing a trade. They let me pick out several pins that I wanted from their shop and this is what I got.

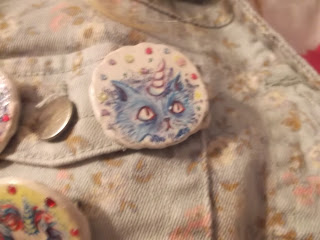
The pins are super cool and well detailed. They are all handmade too! I like to keep them on my floral vest because they match perfectly. I want to order some more in the future. 

I also want to mention that shipping was really fast! It only took a week to come here from Spain. That is great timing~ 


Here are some close up pictures of them to show the detail. They all have glitter and rhinestones attached. They are glued and sealed super well. Not a single one has fallen off and I have worn this vest countless times since I have received my pins. 

The pins I requested are now sold out, but you can always contact them and they will remake the pin for you~

All these items and many more can be purchased from MochiMir!

Friday, June 7, 2013

Rara's Jewels Fairy Kei Giveaway!


Rara's Jewels is hosting a giveaway! This is a great chance to win an awesome package of items. 
What you could win:
Pink Princess Castle Necklace 
Purple Mermaid Tail Necklace
Pink Heart and Purple Bow Necklace
Pink Sea Shell Necklace
Purple Angel Wing Clips
Angel Wing and Heart Clips
Kawaii sticker flakes, memo sheets, and candies

Rules
  • You must be over 18. If you are not over 18 please ask your parents before entering.
  • You must be comfortable with giving me your shipping address. 
  • I will ship anywhere within the United States for free. If you live outside the US you must be willing to help pay for the shipping. International shipping is rather pricey. 
  • Please do not create fake accounts for extra entries. It is unfair. 
  • You must like Rara's Jewels on Facebook in order to unlock the other entries.
  • Some of the entries can be done once a day, so be sure to check back everyday!


a Rafflecopter giveaway

Monday, May 27, 2013

Introduction to my Betta's aquarium!


I want to post more videos in the future, especially when he is being active.. but at least this gives you an overall view of his aquarium.

Saturday, May 18, 2013

Stress Relief Glitter Jars

Several times online I've seen tutorials on how to make stress relief jars. They are sort of like snow globes. You fill an old glass jar with water and lots of glitter and when you are feeling stressed you shake up the jar and watch the glitter slowly fall.
There are lots of different ways online on how to make them. This is how I made mine. c:


You will need some clean glass jars, water, some corn syrup, and glitter. Feel free to use whatever kind of glitter you wish. You can use fine, chunky, shaped, and even glitter glue. 
If you use glitter glue you will need to boil your water before you add it to the jar so the glue part will be easier to break apart. Even if you aren't using glitter glue you should warm up the water a little bit first so that it will mix easier with the corn syrup. The corn syrup makes the water thicker so the glitter doesn't fall down as fast.


You won't need to add too much corn syrup. I added enough to cover the bottom of each jar. Then I poured the warm water on top and mixed it all together with a spoon for a few minutes.


Now add your glitter! Feel free to get as creative as you want with this. I bought a huge pack of Martha Stewart glitters for my resin and I rarely use these colors so I thought this would be a fun way to use them up. I used 4 different shades of green and 6 different red/copper glitters.
 If you used glitter glue you need to mix it up for a while. You want to cut up all the strands so it mixes in smoothly in the water. While your water is warm the glitter is going to fall to the bottom fairly quickly. Do not worry. Let them cool overnight and it should fall more slowly. If you may not have added enough glitter or corn syrup.  


Once they have cooled down you can now decorate the outside of the jars. Sorry that this picture isn't very clear. I took several pictures and the camera did not want to focus. I think it is because of how sparkly the whole thing is.
But you can decorate it with all kinds of stickers. You could also tie ribbons on it. It is usually best to get a jar with smooth sides because it is easier to add stickers on a smooth surface.

Now make sure you have the lid tightly screwed on and shake shake shake to your heart's content and watch the glitter slowly fall to the bottom. Still feel stressed? Shake it up again, and again until you feel better. 


Saturday, May 11, 2013

Custom Painted Platforms

Today when I was at Walmart I picked up these canvas platform shoes. They were about $15, but they also had some other canvas shoes for about $6.


I got my paints, some pain brushes, some popsicle sticks to mix the paints, a paper plate, and of course the shoes. It is best to work outside. If you can't work on them outside them be sure to cover your work area with lots of newspaper. 


I worked with one color at a time. I almost didn't have enough pink. I was afraid to make more since I wasn't sure if I would mix in enough white. Thankfully I had just enough to finish. 


Originally I wasn't going to paint the eyelets, but I smeared a little while painting.. so I just painted over them. They didn't take the paint as well as I hoped, but I didn't want to risk over painting them. When painting canvas shoes you really only want to paint one or two layers because the paint will stiffen the shoes up. 


And last I painted on the lavender. Yay~ My three favorite colors. uwu 


While I waited for the paint to dry I went over next door and visited my Grandmother's cat. Her name is Goldie and sadly one of the neighbors left her here when they moved. She's really friendly and Grandma always makes sure she has food and water out. 


Once the paint dried I sprayed the shoes with a glittery sealant. It usually isn't a good idea to wear painted shoes when it rains, but this will help at least protect it from some moister. I sprayed more than I intended so it is suuuuper glittery. 


I'll probably change the laces around, but for now I put the original laces back on and clipped some extra bone clips I had on them~ I might add more decorations in the future. For now I am happy with them.